Draw Er Diagram in Word
In Visio, with the Database Model Diagram template, you tin create a new model or reverse engineer an existing database into a model.
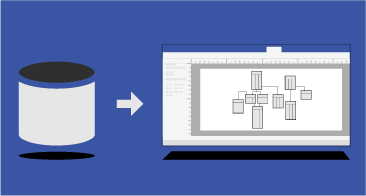
This article describes how to create a database model and what you can do with the model afterward you create information technology.
Note:The Database Model diagram is only available in certain versions of Visio. See Tin't find the database modeling features? for more information.
ane: Start a database-model diagram
If you don't have an existing database that you want to apply as a starting identify, y'all can get-go with a bare Database Model and add together your ain tables and relationships.
-
Select File > New.
-
In the Search box, enter database model and printing Enter.
-
In the search results, double-click Database Model Diagram.
-
Select either Metric Units or US Units, and and then select Create.
The Reverse Engineer Wizard usually opens automatically.
-
Select Abolish to close the wizard.
-
On the Database tab, in the Manage group, select Display Options.
-
In the Database Certificate Options dialog box, select the symbol set that you want to use, and other table and relationship options, and then select OK. Click the Aid button in the dialog box to get more information about the various options.
If you have a database that you want to model so that you can sympathise it better or use it equally a starting place for a new model, use the Reverse Engineer Wizard to extract the schema, or structure, of the database and build a new model.
Before yous start the wizard:
-
If you're going to opposite-engineer an Excel workbook, get-go open up the workbook and proper noun the group (or range) of cells that contains the column headings. If you want to use more than one worksheet, just name the group of cavalcade cells in each worksheet. These ranges are treated like tables in the Reverse Engineer Wizard. For more information about how to name a range of cells, see Define and employ names in formulas.
-
For best results, set your default driver to the target database that yous want to reverse engineer before y'all run the Opposite Engineer Wizard. This footstep ensures that the sorcerer maps the native data types correctly and that all the lawmaking that is extracted by the wizard is correctly displayed in the Code window.
Start the magician:
-
Select File > New.
-
In the Search box, enter database model and press Enter.
-
In the search results, double-click Database Model Diagram. Select Create.
The Reverse Engineer Wizard should open automatically.
If the wizard doesn't open: On the Database tab of the toolbar ribbon, in the Model group, select Contrary Engineer.
-
On the first screen of the Opposite Engineer Wizard, do the following:
-
Select the database commuter for your database management system (DBMS). If you lot have not already associated the Visio database driver with a particular ODBC information source, click Setup.
Notation:If you are reverse engineering an Excel worksheet, choose the ODBC Generic Commuter.
-
Select the data source of the database that you are updating. If you have not already created a data source for the existing database, click New to do then now.
When you create a new source, its name is added to the Data Sources list.
-
When you are satisfied with your settings, click Side by side.
-
-
Follow the instructions in any driver-specific dialog boxes.
For example, in the Connect Data Source dialog box, type the user proper noun and password, then click OK.
Note:If you employ the ODBC Generic Driver, yous may receive an error message that indicates that the reverse engineered information may exist incomplete. In most cases, this is not a trouble — just click OK and go on with the wizard.
-
Select the check boxes for the type of information that you want to excerpt, and so click Side by side.
Notation:Some items may be unavailable (appear grayed out) considering not all database management systems support all the kinds of elements that the wizard tin can extract.
-
Select the check boxes for the tables (and views, if whatsoever) that yous want to excerpt, or click Select All to excerpt them all, and so click Next.
Note:If you are opposite applied science an Excel worksheet and don't run into anything in this listing, it's likely that you need to name the range of cells that contains the column headings in your worksheet. See Define and use names in formulas for more data.
-
If you selected the Stored Procedures cheque box, select the procedures that y'all want to extract, or click Select All to extract them all, and and so click Next.
-
Select whether y'all want the reverse engineered items to be added automatically to the current page.
Annotation:You tin can choose to take the wizard automatically create the drawing, in addition to list the reverse engineered items in the Tables and Views window. If you decide not to have the drawing created automatically, you tin can drag the items from the Tables and Views window onto your drawing page to manually assemble the database model.
-
Review your selections to verify that you are extracting the information that you want, and then click Finish.
The wizard extracts the selected information and displays notes about the extraction process in the Output window.
If you have an existing VisioModeler or PLATINUM ERwin model, you may be able to import information technology to create a Visio database model diagram. This power is express to only VisioModeler 2.0 or later on lexicon model (.imd) files and PLATINUM ERwin ii.6, three.0, and 3.52 .erx files.
-
Select File > New.
-
In the Search box, enter database model and press Enter.
-
In the search results, double-click Database Model Diagram. Select Create.
The Contrary Engineer Magician opens automatically. Select Cancel to close the wizard.
-
On the Database tab, in the Model group, select Import, and then select the model type.
-
Type the path and file proper name for the model that y'all desire to import, or select the Browse button to locate the model file, and then select Open up.
-
In the Import dialog box, select OK.
Visio imports the file and displays its progress in the Output window. The imported tables are displayed in the Tables and Views window.
-
In the Tables and Views window, select the tables that you desire to model, and then drag them onto the drawing page.
This article describes how you can create a database model and what you tin can do with the model afterwards y'all create it. For a quick start, select File > New > Software and Database, and then select Database Model Diagram.
Note:The Database Model diagram is only available in sure versions of Visio. See Can't find the database modeling features? for more information.
1: Outset a database-model diagram
If you don't have an existing database that you want to use as a starting identify, you can outset with a bare Database Model and add your own tables and relationships.
-
Select File > New.
-
Under Template Categories, select Software and Database, and and then select Database Model Diagram.
-
On the right side, select either Metric Units or US Units, and and so select Create.
-
On the Database tab of the ribbon, in the Manage grouping, select Display Options.
-
In the Database Document Options dialog box, select the symbol set that you want to employ and other table and relationship options, and so click OK.
If y'all have a database that y'all want to model then that you can understand it better or employ it every bit a starting place for a new model, yous tin apply the Reverse Engineer Magician to extract the schema, or structure, of the database and build a new model.
Before you start the wizard:
-
If you're going to reverse-engineer an Excel workbook, first open the workbook and proper name the grouping (or range) of cells that contains the column headings. If you lot want to use more than one worksheet, only name the grouping of cavalcade cells in each worksheet. These ranges are treated like tables in the wizard. For more information about how to name a range of cells, see Define and use names in formulas.
-
For best results, set your default driver to the target database that you want to reverse engineer before yous run the Reverse Engineer Magician. This step ensures that the magician maps the native data types correctly and that all the code that is extracted past the wizard is correctly displayed in the Lawmaking window.
Beginning the wizard:
-
Select File > New.
-
Under Template Categories, select Software and Database, and then select Database Model Diagram.
-
On the right side, select either Metric Units or US Units, and then select Create.
-
On the Database tab of the ribbon, in the Model grouping, select Reverse Engineer.
-
On the outset screen of the Reverse Engineer Magician, do the following:
-
Select the Microsoft Office Visio database driver for your database direction organization (DBMS). If you have not already associated the Visio database driver with a particular ODBC data source, click Setup.
Note:If you are reverse engineering an Excel worksheet, cull the ODBC Generic Driver.
-
Select the data source of the database that you are updating. If you have not already created a information source for the existing database, click New to do so now.
When you create a new source, its proper noun is added to the Data Sources list.
-
When you are satisfied with your settings, click Adjacent.
-
-
Follow the instructions in any driver-specific dialog boxes.
For example, in the Connect Data Source dialog box, type a user name and countersign, and then click OK. If your information source is not password protected, just click OK.
Annotation:If yous utilise the ODBC Generic Driver, you may receive an mistake bulletin that indicates that the reverse engineered information may be incomplete. In about cases, this is not a problem—just click OK and continue with the wizard.
-
Select the cheque boxes for the blazon of information that yous want to excerpt, then click Next.
Note:Some items may be unavailable (appear grayed out) because not all database management systems support all the kinds of elements that the wizard can extract.
-
Select the check boxes for the tables (and views, if any) that you want to extract, or click Select All to extract them all, and and then click Side by side.
Note:If y'all are contrary engineering an Excel worksheet and don't see annihilation in this list, it is likely that you need to name the range of cells that contains the column headings in your worksheet. See Define and use names in formulas for more data.
-
If you selected the Stored Procedures bank check box in step 5, select the procedures that y'all desire to extract, or click Select All to excerpt them all, and then click Next.
-
Select whether you want the reverse engineered items to exist added automatically to the electric current page.
Note:Yous can cull to have the magician automatically create the drawing, in add-on to listing the reverse engineered items in the Tables and Views window. If you decide not to have the drawing created automatically, you can drag the items from the Tables and Views window onto your drawing page to manually assemble the database model.
-
Review your selections to verify that you lot are extracting the information that you want, and then click Finish.
The wizard extracts the selected data and displays notes well-nigh the extraction process in the Output window.
If you have an existing VisioModeler or PLATINUM ERwin model, y'all may exist able to import it to create a Visio database model diagram. This ability is express to only VisioModeler 2.0 or later dictionary model (.imd) files and PLATINUM ERwin 2.vi, 3.0, and iii.52 .erx files.
-
Select File > New.
-
Under Template Categories, select Software and Database, and and so select Database Model Diagram.
-
On the right side, select either Metric Units or United states of america Units, and and so select Create.
-
On the Database tab of the ribbon, in the Model group, select Import, and then select the file type you lot want to import from.
-
Type the path and file name for the model that you lot desire to import, or click the Browse button to locate the model file, and and so click Open.
-
In the Import dialog box, click OK.
Visio imports the file and displays its progress in the Output window. The imported tables are displayed in the Tables and Views window.
-
In the Tables and Views window, select the tables that you want to model, and and then drag them onto the cartoon page.
This commodity describes how you can create a database model and what you can do with the model after you create information technology. For a quick start, select File > New > Software and Database, and then select Database Model Diagram.
Note:The Database Model diagram is simply available in sure versions of Visio. See Can't find the database modeling features? for more information.
1: Kickoff a database-model diagram
If you lot don't have an existing database that you desire to utilise as a starting place, you can start with a bare Database Model and add your own tables and relationships.
-
Select File > New > Software and Database, and and then select one of the 2 Database Model Diagram options.
-
On the Database menu, indicate to Options, and then select Certificate.
-
In the Database Certificate Options dialog box, select the symbol set that you want to use and other table and relationship options, and and so click OK.
If you have a database that you lot want to model then that you can sympathise information technology better or utilize it as a starting place for a new model, you can employ the Reverse Engineer Wizard to extract the schema, or construction, of the database and build a new model.
Before y'all start the wizard:
-
If you're going to contrary-engineer an Excel workbook, first open the workbook and proper noun the grouping (or range) of cells that contains the cavalcade headings. If yous want to use more than than ane worksheet, merely proper name the group of column cells in each worksheet. These ranges are treated similar tables in the wizard. For more information almost how to name a range of cells, see Define and use names in formulas.
-
For best results, set your default driver to the target database that you want to opposite engineer before yous run the Opposite Engineer Wizard. This step ensures that the magician maps the native data types correctly and that all the code that is extracted by the sorcerer is correctly displayed in the Code window.
Get-go the magician:
-
On the File menu, signal to New, point to Software and Database, and then select one of the two Database Model Diagram options.
-
On the Database menu, click Reverse Engineer to open up the wizard.
-
On the first screen of the Reverse Engineer Wizard, exercise the following:
-
Select the Visio database commuter for your database management system (DBMS). If y'all take not already associated the Visio database driver with a particular ODBC data source, click Setup.
Annotation:If you are opposite engineering an Excel worksheet, choose the ODBC Generic Driver.
-
Select the data source of the database that y'all are updating. If y'all have not already created a information source for the existing database, click New to exercise so now.
When you create a new source, its proper noun is added to the Data Sources list.
-
When you lot are satisfied with your settings, click Next.
-
-
Follow the instructions in any driver-specific dialog boxes.
For instance, in the Connect Data Source dialog box, type a user proper name and countersign, and so click OK. If your data source is not password protected, just click OK.
Annotation:If yous use the ODBC Generic Commuter, y'all may receive an mistake message that indicates that the contrary engineered information may be incomplete. In most cases, this is non a problem—but click OK and go on with the wizard.
-
Select the check boxes for the blazon of information that you desire to extract, and so click Adjacent.
Notation:Some items may exist unavailable (appear grayed out) considering not all database management systems back up all the kinds of elements that the wizard tin can extract.
-
Select the check boxes for the tables (and views, if whatsoever) that you want to excerpt, or click Select All to extract them all, and so click Next.
Note:If you are reverse engineering an Excel worksheet and don't come across annihilation in this list, it is probable that you lot need to name the range of cells that contains the cavalcade headings in your worksheet. See Define and use names in formulas for more information.
-
If you selected the Stored Procedures check box in step 5, select the procedures that you want to extract, or click Select All to excerpt them all, and so click Adjacent.
-
Select whether you desire the reverse engineered items to exist added automatically to the current page.
Notation:You can choose to take the wizard automatically create the drawing, in improver to listing the reverse engineered items in the Tables and Views window. If you decide not to have the cartoon created automatically, you can drag the items from the Tables and Views window onto your drawing page to manually get together the database model.
-
Review your selections to verify that y'all are extracting the information that y'all want, and so click Finish.
The wizard extracts the selected information and displays notes about the extraction procedure in the Output window.
If you have an existing VisioModeler or PLATINUM ERwin model, you may be able to import it to create a Visio database model diagram. This ability is limited to only VisioModeler 2.0 or later dictionary model (.imd) files and PLATINUM ERwin 2.half dozen, three.0, and 3.52 .erx files.
-
On the File carte, point to New, point to Software and Database, and so click Database Model Diagram.
-
On the Database carte du jour, bespeak to Import, and and so click Import <model type>.
-
Type the path and file name for the model that y'all want to import, or click the Browse button to locate the model file, and and then click Open up.
-
In the Import dialog box, select OK.
Visio imports the file and displays its progress in the Output window. The imported tables are displayed in the Tables and Views window.
-
In the Tables and Views window, select the tables that you want to model, and and then drag them onto the drawing page.
two: Refine the structure of the diagram
After you create a database model diagram, the work of refining the diagram begins. You can add and customize the three main components of a model:
-
Entities (or tables),
-
Columns (which describe facts about a table), and
-
Relationships (the associations between tables). Relationships can exist one-to-one, one-to-many, or many-to-many.
Select a heading below to open instructions about adding the feature to your model.
There are two stencils that come with the Database Model Diagram template. As you lot begin to refine the structure of your diagram, piece of work from the stencil that's right for you lot:
-
Use the Entity Relationship stencil to model databases that are based on the SQL92 and earlier standards.
-
Use the Object Relational stencil, which has additional shapes for working with types, to model databases that are based on SQL99 and later standards.
Utilise the Entity shape to create a tabular array in your diagram:
-
From either the Entity Relationship or Object Relational stencil, drag an Entity shape onto the drawing.
-
Double-click the shape to open the Database Properties window.
-
Under Categories, click Definition and type a proper noun for the tabular array.
-
Nether Categories, click Columns, type a proper noun, and cull a data type.
-
Select the Req'd check box for columns that can't accept null values.
-
Select the PK (primary key) bank check box for columns that uniquely place each row in the database table.
-
Under Categories, click Indexes, Triggers, Check, or Extended to create these optional elements.
Use the Database Backdrop window to add or modify properties for columns, including information types and primary keys:
-
Double-click the table in your diagram.
-
In the Database Properties window, nether Categories, click Columns.
-
Click in the outset empty Physical Name prison cell, and type a name.
-
To alter the information blazon for a column, click the column's Data Type field, so select a information type from the list or type it into the list. For case, you can type decimal(8,2) or char(thirty).
-
To prevent nada values, select the Req'd bank check box.
-
To specify that the cavalcade is a primary key, select the PK check box.
-
To come across more cavalcade properties in addition to those that appear when you lot click the Columns category, select the column and then click Edit.
Relationships use main and foreign keys to allow databases to lucifer a row in one table with a row in a related table. Y'all can prove those relationships in your diagram. In addition, you can set their cardinality (for case, one-to-many) and employ either Crow's anxiety, Relational, or IDEF1X notation to evidence the cardinality. You can't show many-to-many relationships with any of these notations in the Database Model Diagram template.
Create a relationship between tables:
-
Make sure that both tables are visible in the diagram. If yous reverse engineered the model from an existing database, y'all may demand to elevate one or both from the Tables and Views window onto the drawing folio.
-
Double-click the table that you want for the primary key side of the relationship.
-
In the Database Properties window, under Categories, click Columns.
-
In the grid, click the column that you lot want to employ to uniquely identify each row in the table, and select the PK check box to set it equally the master key.
-
From the Object Relational or Entity Relationship stencil, drag a Human relationship shape and drib it onto a blank space on the folio.
-
Connect the higher end to the table with the parent table.
-
Connect the other cease to the child table.
If the 2d table doesn't already incorporate a column with the same name as the main key, the modeler adds it to the 2d table as a foreign cardinal.
Note:If human relationship lines disappear, on the Database tab, in the Manage grouping, click Brandish Options. On the Relationships tab, under Evidence, select the Relationships bank check box.
Set the relationship'due south cardinality:
-
Double-click the human relationship.
-
In the Database Properties window, under Categories, click Miscellaneous.
-
Under Cardinality, choose the cardinality that best fits the relationship. For one-to-many relationships, the all-time selection is either Nada or more or I or more. For one-to-one relationships, the best choice is either Zero or i or Exactly 1.
3: Add features for searching and updating information
To make other refinements to your diagram (such equally creating indexes, check clauses, and triggers), select a heading below to open instructions almost calculation doing whatever of the following:
Indexes improve the performance, or speed, of your database when y'all run a query.
-
Open the database model diagram.
-
Double-click the table to which yous want to add an alphabetize, and in the Database Properties window, in the Categories list, click Indexes.
-
Click New.
-
In the Create Alphabetize dialog box, type a name for the index, so click OK.
-
In the Alphabetize Blazon list, select an choice to create a unique or non-unique alphabetize.
-
In the Available Columns listing, select the proper name of each cavalcade that y'all want to include in this alphabetize, and then click Add >.
-
In the Indexed Columns list, select the Asc check box to create an index that has an ascending sort order, or clear the check box to create an index that has a descending sort gild.
The database model diagram is updated.
You can think of a view as a saved query. Views are especially handy if you lot need to repeatedly admission the same data from multiple tables, or if you desire to expose the data to users without letting them modify the bodily tables.
From the Entity Relationship or Object Relational stencil, drag a View shape onto the drawing folio.
Depending on your database management system (DBMS), you may be able to gear up extended properties for tables or views to determine where they are stored.
Double-click the table or view whose extended properties yous want to set, and in the Database Backdrop window, in the Categories listing, click Extended.
Use check clauses to ensure that the information that is entered into a column is within a particular range of values. For instance, you tin create a bank check clause that requires the data in a column called "Historic period" to be over 65.
-
Double-click the table to open the Database Properties window.
-
Under Categories, click Columns and then click the column that you want to add a check clause to.
-
Click Edit.
-
On the Cheque tab of the Cavalcade Properties dialog box, enter the constraints that you want. For more information nearly your choices, meet Column and Field Properties dialog box (Check tab).
The check clause is added to the Code window under Local code.
Utilize stored procedures and user-defined functions to create packets of lawmaking that you can reuse to perform the same actions repeatedly. The major deviation between the two is that a user-defined role returns a value, whereas the stored procedure executes lawmaking without returning a value.
-
On the Database tab, in the Show/Hide grouping, select the Code cheque box to open up the Code window.
-
Click Global Code and then click New.
-
On the Properties tab of the Lawmaking Editor, click the kind of code that yous want to create, and type a name for the code.
-
On the Trunk tab, type the code and so click OK.
Triggers cause SQL code that you lot specify in the trigger to run when a particular event occurs in the database.
-
Double-click the table to open up the Database Properties window.
-
Under Categories, click Triggers, and so click Add.
-
On the Properties tab, type a name for the trigger.
-
On the Body tab, type the lawmaking and then click OK.
The trigger is added to the Code window under Local code.
Tin can't find the database modeling features?
Some editions of Visio lack some or all the database modeling features:
-
Visio Standard does non include the Database Model Diagram template.
-
Visio Professional and Premium editions support the reverse engineering science features for the Database Model Diagram template (that is, using an existing database to create a model in Visio) just they don't support forwards engineering science (that is, using a Visio database model to generate SQL lawmaking).
-
The full suite of database modeling features, including both reverse engineering and frontwards engineering science, is in Visio for Enterprise Architects. Visio for Enterprise Architects is included in MSDN Premium Subscription, which is available with Visual Studio Professional and Visual Studio Team System role-based editions.
To find out which edition of Visio you have, click About Microsoft Function Visio on the Help carte. The name of the edition is in the top line of text in the dialog box.
If you are using Visio Plan 2 and want to larn about how to engineer an existing database into a database model, see Reverse engineer an existing database.
See As well
Define a human relationship in a Database Model diagram
Create or edit views in Database Model diagrams
Add together tables and columns to Database Model diagrams
Set and edit information types in Database Model diagrams
Show Crow's Human foot notation in a database model diagram
Create or edit an index in a Database Model diagram
Preserve referential integrity in Database Model diagrams
Source: https://support.microsoft.com/en-us/office/create-a-database-model-also-known-as-entity-relationship-diagram-in-visio-7042e719-384a-4b41-b29c-d1b35719fc93
0 Response to "Draw Er Diagram in Word"
Post a Comment